顯示具有 工作與備忘錄 標籤的文章。 顯示所有文章

2019年10月18日 星期五

Oracle DB - 修改主機hostname and ip address 之後 DB Control/DB Console (OEM) 無法啟動


將Oracle DB主機 hostname and ip address 修改之後,database and listener可以正常啟動。

但是 DB Control/DB Console (OEM) 無法啟動,錯誤訊息如下:
[oracle@testdb88 ~]$ emctl start dbconsole
OC4J Configuration issue. /u01/app/oracle/product/11.2.0/db_1/oc4j/j2ee/OC4J_DBConsole_testdb88_DB11G not found.


1) Set  $ORACLE_HOSTNAME to the old hostname:

[oracle@testdb88 ~]$ export ORACLE_HOSTNAME=oradb02


2) De-configure the old DB Console:

[oracle@testdb88 ~]$ $ORACLE_HOME/bin/emca -deconfig dbcontrol db

STARTED EMCA at Oct 18, 2019 4:39:26 PM
EM Configuration Assistant, Version 11.2.0.3.0 Production
Copyright (c) 2003, 2011, Oracle.  All rights reserved.

Enter the following information:
Database SID: DB11G

Do you wish to continue? [yes(Y)/no(N)]: Y
Oct 18, 2019 4:39:33 PM oracle.sysman.emcp.EMConfig perform
INFO: This operation is being logged at /u01/app/oracle/cfgtoollogs/emca/DB11G/emca_2019_10_18_16_39_26.log.
Oct 18, 2019 4:39:33 PM oracle.sysman.emcp.EMDBPreConfig performDeconfiguration
Enterprise Manager configuration completed successfully
FINISHED EMCA at Oct 18, 2019 4:39:36 PM


3) Un-set $ORACLE_HOSTNAME:


4) Create the new DB Console:

[oracle@testdb88 ~]$ $ORACLE_HOME/bin/emca -config dbcontrol db -repos recreate

STARTED EMCA at Oct 18, 2019 4:42:21 PM
EM Configuration Assistant, Version 11.2.0.3.0 Production
Copyright (c) 2003, 2011, Oracle.  All rights reserved.

Enter the following information:
Database SID: DB11G
Listener port number: 1521
Listener ORACLE_HOME [ /u01/app/oracle/product/11.2.0/db_1 ]:
Password for SYS user:
Password for DBSNMP user:
Password for SYSMAN user:
Email address for notifications (optional):
Outgoing Mail (SMTP) server for notifications (optional):
-----------------------------------------------------------------

You have specified the following settings

Database ORACLE_HOME ................ /u01/app/oracle/product/11.2.0/db_1

Local hostname ................ testdb88
Listener ORACLE_HOME ................ /u01/app/oracle/product/11.2.0/db_1
Listener port number ................ 1521
Database SID ................ DB11G
Email address for notifications ...............
Outgoing Mail (SMTP) server for notifications ...............

-----------------------------------------------------------------
----------------------------------------------------------------------
WARNING : While repository is dropped the database will be put in quiesce mode.
----------------------------------------------------------------------
Do you wish to continue? [yes(Y)/no(N)]: Y
Oct 18, 2019 4:43:34 PM oracle.sysman.emcp.EMConfig perform
INFO: This operation is being logged at /u01/app/oracle/cfgtoollogs/emca/DB11G/emca_2019_10_18_16_42_21.log.
Oct 18, 2019 4:43:35 PM oracle.sysman.emcp.EMReposConfig invoke
INFO: Dropping the EM repository (this may take a while) ...
Oct 18, 2019 4:44:36 PM oracle.sysman.emcp.EMReposConfig invoke
INFO: Repository successfully dropped
Oct 18, 2019 4:44:37 PM oracle.sysman.emcp.EMReposConfig createRepository
INFO: Creating the EM repository (this may take a while) ...
Oct 18, 2019 4:48:05 PM oracle.sysman.emcp.EMReposConfig invoke
INFO: Repository successfully created
Oct 18, 2019 4:48:07 PM oracle.sysman.emcp.EMReposConfig uploadConfigDataToRepository
INFO: Uploading configuration data to EM repository (this may take a while) ...
Oct 18, 2019 4:48:53 PM oracle.sysman.emcp.EMReposConfig invoke
INFO: Uploaded configuration data successfully
Oct 18, 2019 4:48:55 PM oracle.sysman.emcp.util.DBControlUtil secureDBConsole
INFO: Securing Database Control (this may take a while) ...
Oct 18, 2019 4:49:01 PM oracle.sysman.emcp.util.DBControlUtil secureDBConsole
INFO: Database Control secured successfully.
Oct 18, 2019 4:49:01 PM oracle.sysman.emcp.util.DBControlUtil startOMS
INFO: Starting Database Control (this may take a while) ...
Oct 18, 2019 4:49:34 PM oracle.sysman.emcp.EMDBPostConfig performConfiguration
INFO: Database Control started successfully
Oct 18, 2019 4:49:34 PM oracle.sysman.emcp.EMDBPostConfig performConfiguration
INFO: >>>>>>>>>>> The Database Control URL is https://testdb88:1158/em <<<<<<<<<<<
Oct 18, 2019 4:49:36 PM oracle.sysman.emcp.EMDBPostConfig invoke
WARNING:
************************  WARNING  ************************

Management Repository has been placed in secure mode wherein Enterprise Manager data will be encrypted.  The encryption key has been placed in the file: /u01/app/oracle/product/11.2.0/db_1/testdb88_DB11G/sysman/config/emkey.ora. Ensure this file is backed up as the encrypted data will become unusable if this file is lost.

***********************************************************
Enterprise Manager configuration completed successfully
FINISHED EMCA at Oct 18, 2019 4:49:36 PM


4) 確認 dbconsole已經正常啟動:

[oracle@testdb88 ~]$ emctl status dbconsole
Oracle Enterprise Manager 11g Database Control Release 11.2.0.4.0
Copyright (c) 1996, 2013 Oracle Corporation.  All rights reserved.
https://testdb88:1158/em/console/aboutApplication
Oracle Enterprise Manager 11g is running.
------------------------------------------------------------------
Logs are generated in directory /u01/app/oracle/product/11.2.0/db_1/testdb88_DB11G/sysman/log


2019年10月1日 星期二

在 Red Hat Enterprise Linux/CentOS 7 上安裝 Zabbix Server 4.2


Install Zabbix 4.2 在 RHEL7 

常見的開源監控軟體,有Zabbix、Nagios、Prometheus.......。
其中 Zabbix Server非常容易安裝,參考原廠安裝手冊,以下分享整個安裝過程與詳細指令。一個小時內可以完成安裝設定。


安裝元件介紹

使用標準的LAMP組合


  1. RHEL7
  2. Apache
  3. MySQL (Mariadb 5.5)
  4. PHP
  5. zabbix-4.2-2.el7 rpm pacakge


關閉Linux防火牆

systemctl stop firewalld
systemctl disable firewalld

SELinux

To do this edit the "/etc/selinux/config" file, making sure the SELINUX flag is set as follows.
If SELinux is configured after installation, the server will need a reboot for the change to take effect.

SELINUX=permissive

getenforce
setenforce permissive
getenforce

Frontend installation prerequisites

Zabbix frontend requires additional packages not available in basic installation. You need to enable repository of optional rpms in the system you will run Zabbix frontend on:

ll /etc/yum.repos.d/
vi public-yum-ol7.repo

[root@aot-zbx02 yum.repos.d]# vi public-yum-ol7.repo
[ol7_optional_latest]
name=Oracle Linux $releasever Optional Latest ($basearch)
baseurl=https://yum.oracle.com/repo/OracleLinux/OL7/optional/latest/$basearch/
gpgkey=file:///etc/pki/rpm-gpg/RPM-GPG-KEY-oracle
gpgcheck=1
enabled=1


安裝MariaDB

yum repolist
yum list mariadb*
yum install mariadb*


安裝 php, httpd

yum install nmap httpd policycoreutils-python net-snmp net-snmp-utils php-bcmath php-mbstring php-xml curl curl-devel net-snmp-devel perl-DBI
yum install php php-gd php-ldap php-mysql php-odbc php-pdo php-pear php-pecl-memcache php-soap php-xmlrpc


Start MariaDB

systemctl start mariadb
systemctl enable mariadb
systemctl status mariadb


修改資料庫root密碼 (選用)

mysqladmin -uroot password 1234qwer


Adding Zabbix repository

rpm -Uvh http://repo.zabbix.com/zabbix/4.2/rhel/7/x86_64/zabbix-release-4.2-2.el7.noarch.rpm


Install Zabbix Server, Zabbix Forntend and Zabbix Agent

yum install zabbix-server-mysql zabbix-web-mysql zabbix-agent


Creating database

MySQL - Character set utf8 and utf8_bin collation is required for Zabbix server to work properly with MySQL database.

mysql -uroot
mysql> create database zabbix character set utf8 collate utf8_bin;
mysql> grant all privileges on zabbix.* to zabbix@localhost identified by 'zabbix';


Importing data

zcat /usr/share/doc/zabbix-server-mysql*/create.sql.gz | mysql -uzabbix -pzabbix zabbix

mysql -uzabbix -pzabbix zabbix

mysql> SELECT
table_name AS `Table`,
round(((data_length + index_length) / 1024 / 1024), 2) `Size in MB`
FROM information_schema.TABLES
WHERE table_schema = "zabbix";


Configure database for Zabbix server

vi /etc/zabbix/zabbix_server.conf

LogFileSize=10
DBHost=localhost
DBName=zabbix
DBUser=zabbix
DBPassword=zabbix


Starting Zabbix server process

systemctl start zabbix-server
systemctl enable zabbix-server
systemctl status zabbix-server


Zabbix frontend configuration

For RHEL 7 and later the Apache configuration file for Zabbix frontend is located in /etc/httpd/conf.d/zabbix.conf.

vi /etc/httpd/conf.d/zabbix.conf

        # php_value date.timezone Europe/Riga
        php_value date.timezone Asia/Taipei


systemctl start httpd
systemctl enable httpd


Frontend installation steps 

Allow you to access your newly installed Zabbix.
Note that a Zabbix proxy does not have a frontend; it communicates with Zabbix server only.

http://zabbix-frontend-hostname/zabbix

Enter password of zabbix


Configure and start Zabbix Agent


vi /etc/zabbix/zabbix_agentd.conf
LogFileSize=10
Server=127.0.0.1
ServerActive=127.0.0.1
Hostname=Zabbix server


systemctl start zabbix-agent
systemctl status zabbix-agent
systemctl enable zabbix-agent


All jobs are completed 


Zabbix frontend is available at http://zabbix-frontend-hostname/zabbix in the browser. Default username/password is Admin/zabbix.


參考資訊~~原廠手冊 

https://www.zabbix.com/documentation/4.2/manual/installation/install_from_packages/rhel_centos

2019年9月27日 星期五

PL/SQL Developer 自動記憶帳號 username and 密碼 password


1 記憶帳號 username

 Configure -->  Preferences -> User Interface - Options

勾選 Autosave username --> OK


2 記憶密碼 password

Configure --> Preferences -->  Oracle  --> Logon History  -> Definition

勾選 Store history 和Store with password  --> OK

2019年8月21日 星期三

做功課 - YouTube影片用的剪輯軟體


1. Windows 與 Mac 都有內建不錯的影片剪輯軟體。
Windows 上是「 Movie Maker 」  --> 沒了
Mac 上是「 iMove 」

https://support.microsoft.com/zh-tw/help/4054502/windows-10-movie-maker-is-no-longer-available-for-download

Windows Movie Maker 已不再提供下載
適用於: Windows 10Windows 8.1Windows 7 更多
Windows 10
Windows Movie Maker 屬於 Windows 程式集 2012 的一部分,已不再提供下載。提供免費下載 Movie Maker 的網站並非提供真正的程式,這些下載項目可能包含惡意軟體、病毒或隱藏費用。

請改用 Windows 10 隨附的 [相片] App 來製作影片。最新版本的 [相片] App 提供可建立和編輯包含音樂、文字、動作、濾鏡及 3D 效果之影片的功能。請瀏覽 Microsoft Store,以取得更多建立和編輯影片的應用程式。

Windows 7 和 Windows 8.1
Windows Movie Maker 屬於 Windows 程式集 2012 的一部分,已不再提供下載。提供免費下載 Movie Maker 的網站並非提供真正的程式,這些下載項目可能包含惡意軟體、病毒或隱藏費用。


2. YouTouber使用的剪輯軟體有很多 例如: Final Cut Pro, Adobe Premiere, 威力導演......挑一套軟體來學。
The Best Video Editing Software for 2019

3. iMac或 Mac 用戶,直接用內建iMovie,熟練後再花錢上FCP (Final Cut Pro)
先從iMovie練習,可以熟悉影片編輯功能,基本上夠用。真的有需求再進階至 Final Cut Pro ,FCP 的操作概念跟 iMovie 很相像,記得要多安裝一顆大容量的SSD來提升速度。FCP X不會比威力導演難上手,它的介面已經簡化到類似iMovie 了,輸出選項裡還有直接上傳Youtube的功能

4. Windows PC 用威力導演
新手的話,建議威力導演,操作簡單,電腦配備需求低,試用版有浮水印,需要多一點功能再升級正式版。 或用免費的影片剪輯軟體
Openshot
Shotcut

5. FCP比較專業(較貴),威力導演比較入門(較便宜)
預算在5萬上下,組PC會是比較好的選擇,可以把錢花在更好的CPU及更大的SSD。非頂規的iMac,都視為筆電,心理準備是三年後就不敷使用。 更好的PC規格: i7、32G RAM、1TB SSD+ 4T HDD、GTX750以上(或顯卡記憶體1G以上),用Premier。

6.iMovie的特點
大量"預設"好的功能和特效 --> iMovie
如果就那麼不巧的剛好都不合你的胃口、在影片編輯上反而會感覺有點扯後腿,免費的將就用吧。


參考資訊:

  1. 電腦玩物站長 Esor (異塵行者): OpenShot 免費中文版影片剪輯軟體,何必用精簡版的威力導演
  2. 正在找 Windows 版的 iMovie 嗎?
  3. https://www.apple.com/tw/imovie/
  4. https://www.apple.com/tw/final-cut-pro/


2019年7月17日 星期三

遠端支援、遠端存取、服務台、線上協同作業和會議 teamviewer


TeamViewer – 遠端支援、遠端存取、服務台、線上協同作業和會議

https://www.teamviewer.com/tw/


AnyDesk: The Fast Remote Desktop Application


https://anydesk.com/


Splashtop Downloads - Remote Desktop, Remote Support & Education

https://www.splashtop.com


Chrome 遠端桌面 - Google Chrome

https://chrome.google.com


GoToMyPC Remote Access - Remote Desktop Software for Mac or PC

https://get.gotomypc.com/


Zoom 雲端視訊會議-企業專屬|全球獨步|多人視訊|Zoom 我的隨身會議室

https://zoomnow.net/


Video Conferencing, Online Meetings, Screen Share | Cisco Webex

https://www.webex.com/

2019年7月15日 星期一

Oracle DB - Database 版本與授權


  • Oracle產品版本

從2015年12月開始 Database 大致上分為2種版本:
企業版Enterprise Edition (EE)
價位高,全功能、無使用限制(譬如可用 RAC(extra cost), Data Guard, Online table redefinition, Flashback, Diagnostics Pack, Tuning Pack等功能)。
標準版Standard Edition 2 (SE2)
價位約為EE的三分之一,禁止安裝到支援超過2 Socket(CPU插槽)的機器上,最大支援 16 CPU threads per database instance。


  • Oracle的授權計算方式

採NUP(Named User Plus) Processor(處理器/CPU),兩者擇一。

1. 採Processor計價
EE版 processor數=CPU*(Core數/每CPU)*CoreFactor,有小數時無條件進位。假設有1台DB Server,有1CPU,6核,CoreFactor=0.25。Processor數=1*6*0.25=1.5。小數點無條件進位 所以要買 2 Processors。

SE2版 processor數=occupied socket=主機版上有插CPU的socket數,也就是說直接依CPU數計算。


2. 採User計價
Oracle稱此User計價的方式為Named User Plus License,簡稱NUP,分成兩類:
設備: 自動運作,且存取Oracle DB。
真人: 有操作電腦並使用到Oracle DB的真人。

各版本的最低採購量。EE版:25 NUP/Processor,SE/SE1版:5 NUP/Customer。


  • 如果在虛擬機器上面安裝Oracle DB,譬如Oracle on VMware,可否用限制vCPU的方式節省license費用呢??

The answer is: Oracle on VMware要計算所有ESXi host cores (VM Cluster內都要買oracle license)

For example, let’s say we have a vSphere Cluster dedicated to run Oracle workloads called “OraCluster” with 3 ESXi servers, each ESXi server having 2 socket x 10 cores each. The processor is Intel Family.

Total no of effective cores for licensing Oracle workloads in “MyCluster” using Enterprise Edition (EE)
= Absolute number of cores in cluster * Processor Core Factor
= ( 3 servers * 2 sockets per server )  * ( 10 cores/socket )  * ( Processor Core Factor for Intel Family )
= 6 * 10 * 0.5
= 30 Effective cores liable for Oracle licensing


參考資訊:
https://blogs.vmware.com/apps/2017/01/oracle-vmware-vsan-dispelling-licensing-myths.html
https://blog.xuite.net/chiouchienchung/twblog/174429884-%E7%94%B2%E9%AA%A8%E6%96%87Oracle%E7%9A%84%E7%89%88%E6%9C%AC%E8%88%87%E6%8E%88%E6%AC%8A%EF%BC%8C%E4%BB%A5DB%E7%82%BA%E4%BE%8B
https://jaychu649.blogspot.com/2018/03/oracle-on-vmware.html


2019年7月9日 星期二

Oracle DB - 現行版本生命週期與支援說明


Oracle Database 現行版本
1. 11gR1(11.2) - 11.2.0.4
2. 12cR1(12.1) - 12.1.0.2
3. 12cR2(12.2) - 12.2.0.1
4. 18c - 12.2.0.2
5. 19c - 12.2.0.3

以目前使用的11.2.0.4 版本來說,是2009年9月released。
2019/09~2014/12 - Premier Support 期
2015/01~2020/12 - Extended Support 期
2021/01~ - Sustaining Support 期

簡單來說:
1. Premier Support 可以獲得完整的支援。
2. Extended Support 除了無法獲得對大部分3rd party產品的相容性,可以獲得完整的支援。 但必須留意Extended Support是必須另外購買的,不包含在Premier Support 合約中。
如果沒有購買Extended Support,則Oracle只提供Sustaining Support相關服務。
3. Sustaining Support 可以access KB,可以開SR,但無法使用最新的軟體更新與Patch,只能使用Premier Suppport期(Pre-existing)的。


參考資訊:

2019年7月4日 星期四

Oracle DB - 使用Profile 來限定 session 的 idle_time and 限制總連線時間


--修改 ORADB PROFILE
--Idle_time: 30 分鐘   (指定會話允許連續不活動的總的時間,以分鐘為單位,超過該時間,會話將斷開。但是長時間執行查詢和其他操作的不受此限制。)
--Connect_time 10000 分鐘   (指定會話的總的連線時間,以分鐘為單位。)

SYSTEM@ORADB

set pagesize 100;
set linesize 200;

column profile format a20;
column RESOURCE_NAME format a30;
column RESOURCE_TYPE format a20;
column LIMIT format a20;

select RESOURCE_NAME, LIMIT from dba_profiles where profile = 'DEFAULT' and RESOURCE_NAME in ('IDLE_TIME', 'CONNECT_TIME');

ALTER SYSTEM SET RESOURCE_LIMIT=TRUE scope=both;
ALTER PROFILE "DEFAULT" LIMIT
  CONNECT_TIME 10000
  IDLE_TIME 30;

select RESOURCE_NAME, LIMIT from dba_profiles where profile = 'DEFAULT' and RESOURCE_NAME in ('IDLE_TIME', 'CONNECT_TIME');


參考文件: https://fecbob.pixnet.net/blog/post/38198111-oracle-profile%E4%BD%BF%E7%94%A8%E8%A9%B3%E8%A7%A3


FAILED_LOGIN_ATTEMPTS : 容許登入失敗的次數
PASSWORD_LIFE_TIME : 可使用相同密碼認證的天數
PASSWORD_REUSE_TIME : 如果你指定天數期間內,密碼變更次數達到PASSWORD_REUSE_MAX指定次數前,密碼無法再使用,如果PASSWORD_REUSE_TIME和PASSWORD_REUSE_MAX任一者指定UNLIMITED參數,密碼無法再使用,兩者指定為UNLIMITED,且無視這些參數
PASSWORD_LOCK_TIME : 連續登入失敗到達指定次數後,帳戶鎖定天數
PASSWORD_GRACE_TIME : 仍允許登入但提出警告的猶豫天數
PASSWORD_VERIFY_FUNCTION : 指定檢查密碼函數,指定NULL則不進行密碼驗證
SESSIONS_PER_USER : 限制使用者可同時執行的作業階段數
CPU_PER_SESSION : 作業階段使用的CPU時間限制(100分之1秒)
CPU_PER_CALL : 單一叫用的統計CPU時間限制(100分之1秒)
CONNECT_TIME : 單一作業階段經過時間統計限制(分)
IDLE_TIME : 作業階段中,連續的非活動時間長度(分)
LOGICAL_READS_PER_SESSION : 單一作業階段中讀入資料區塊限制
COMPOSITE_LIMIT : 單一作業階段的資源與成本,按服務單位指定
PRIVATE_SGA : 單一作業階段中,共享資料區內可分配的私有空間大小,可用位元為KB(K),MB(M),GB(G),TB(T),PB(P),EF(E)等單位指定

Oracle Database Editions (Oracle 19c SE2 沒有RAC可以用了)


11gR2可以分為三種版本
EE (Enterprise Edition) - 可用 RAC(extra cost), Data Guard, Online table redefinition, Flashback, Diagnostics Pack, Tuning Pack
SE (Standard Edition) - 可用 RAC
SE1 (Standard Edition One)

從2015年12月,Oracle 發佈了 Oracle Standard Edition 2 (SE2)取代先前的
Standard Edition (SE)
Standard Edition One (SE1)


SE2 允許 use of 2 sockets,限制 the total number of CPU sockets and the maximum number of 16 CPU threads per database instance.

實際應用上,這表示我們可以建置一個RAC(Real Application Cluster),含有兩個server,每個server with only one CPU socket,並且no more than 8 CPU threads that can be used by each database instance. (適用於於Oracle 18c 與更早的版本,但要注意Premier Support would end for 18c)

SE 允許 use of 4 sockets without any limitation on the number of CPU threads.
SE1 允許 use of 2 sockets without any limitation on the number of CPU threads. 


Oracle 19c
從Oracke 19c 開始,Oracle RAC已經不被允許使用在Standard Edition Two (SE2)。
可以參考 “Database Licensing Information User Manual”

但Oracle 19c有最長時間“Premier Support”,因此是更適合從11g升級的版本。


如果RAC仍然需要怎麼辦:
選項1:保留現有的Standard Edition許可證並開始使用Oracle自治數據庫(在線事務處理(OTP))
選項2:使用RAC選項切換到Oracle Enterprise Edition(EE)
選項3:切換到公共雲。

如果沒有必要RAC:
如果您的公司不需要RAC,則可以遷移/升級到Oracle 19c SE2(如果使用單實例數據庫),留心SE2的硬件限制(use of 2 sockets,限制 the total number of CPU sockets and the maximum number of 16 CPU threads per database instance.) 。


2019年4月9日 星期二

為什麼TPAM會使用49154, 49155 port 連接受管目標主機?


49154 and 49155 Windows Server 內部定義的RPC dynamic port,當TPAM使用TCP/135和受管目標主機初始連接後,接下來會使用RPC dynamic port來做後續的連接。
WMI / DCOM from DPA/TPAM will need access to TCP/135 to initiate communication on the target. The subsequent conversation then continues on a random negotiated port.
On Windows 2003/XP this would be in the range 1025 - 5000 on Windows 7/Windows 2008 and above : 49152 - 65535.

TPAM的標準功能會使用WMI/DCOM access  target,沒有強制關閉的方式。

如果要避免TCP/135, 49154, 49155 的使用的話,
  1. 請確認沒有使用下列功能
- Managing service account passwords ("Change password for Windows Service started by this account" ticked)
- Managing scheduled task passwords ("Change password for Scheduled Tasks started by this account" ticked)
- Restarting a service ("Automatically restart such Services" ticked)
- Using Account Discovery on the target
- Using Event Capture on PSM sessions (Privileged Session Manager)


  1. 請確認每套windows server System->Deteils->Information-> 填寫Computer Name(用大寫英文字母),如果沒有填寫TPAM會使用WMI連接目標主機獲取主機名稱。


參考資訊:
1. How to configure RPC dynamic port allocation to work with firewalls
2. https://support.oneidentity.com/kb/123021/ports-used-by-windows-or-windows-active-dir-platforms
3. https://support.oneidentity.com/tpam/kb/230930/which-tpam-features-use-wmi-and-which-do-not-

2019年1月19日 星期六

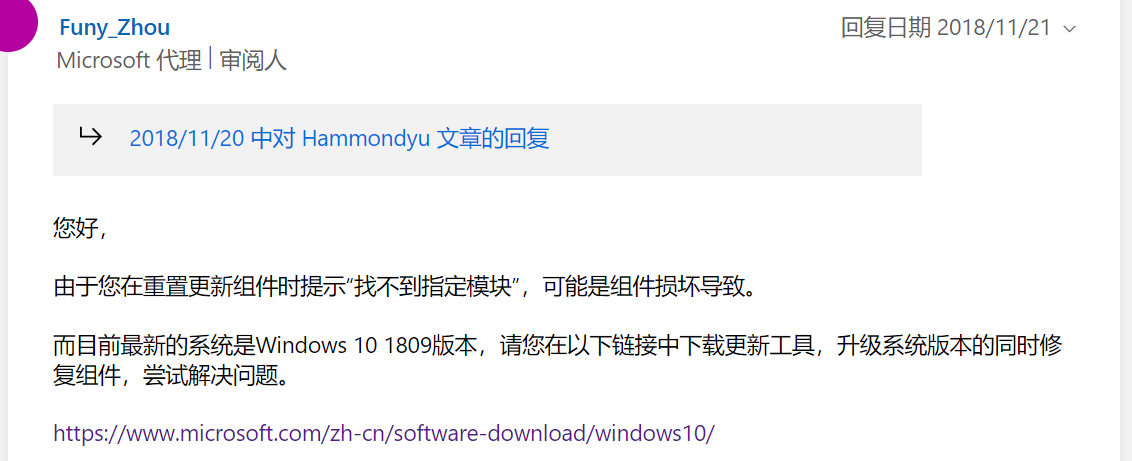
Troubleshoot - 2018-11 適用於 x64 系統 Windows 10 Version 1803 的更新 (KB4023057) - 錯誤 0x80070643


Windows 10 Version 1803 執行Windows Update 出現錯誤

更新 (KB4023057) - 錯誤 0x80070643


試了兩個方式無效
1. Windows 問題疑難排解 (Troubleshoot)
2. Dism


最後找到簡單的方式解決,直接更新到 Windows 10 Version 1803 即可

https://answers.microsoft.com/zh-hans/windows/forum/all/2018-%E9%80%82%E7%94%A8%E4%BA%8E-windows-10/241f4af0-d8fa-46cb-b5f9-0d0fb71410ba


檢查適用性與下載網址  https://www.microsoft.com/zh-tw/software-download/windows10/


2019年1月15日 星期二

TPAM - request申請單的生命週期與簽核


TPAM 中的申請單會有一個屬性,稱為狀態(Status)。從申請開始到使用結束,生命週期中有下方這些狀態。

  • Pending Approval - waiting for authorized approver/s to approve the request.
  • Active/Approved - the request has been approved and is within the release duration window.
  • Approved - the request has been approved but the request date/time is in the future.
  • Denied - the request was denied by the approver/s.
  • Canceled - the submitted request conflicts with a request that has already been approved for the same time period or the requestor decides to cancel the request prior to accessing the password. The request will also be cancelled if the ticket number entered on the request requires validation, and fails.
  • Expired - the release window for the password has passed or the requestor is done accessing the password and expires the request early.
  • Extended - the release has been extended past the original requested duration.

當申請者提出request,核准者會收到郵件通知。點選下方的URL Link即可登入系統簽核該張申請單。


當表單已經被簽核過,表單狀態變更了,再次點擊URL Link進入TPAM系統,會發生什麼狀況?  以下做個小測試:

Pending Approval


Approved


Expired


Denied


當一張Request申請單,還沒有結束他的生命週期,卻遇到了權限變更,有時候直接點選URL進行簽核會遇到問題,如下方幾個貼圖。這時候回到TPAM登入後的首頁,點選Pending Approval進行表單簽核即可。

Firefox:


 IE:


2019年1月7日 星期一

Active Roles - 新增使用者時 自動給預設密碼

在使用ARS Web介面,新增使用者時,可以用OU為單位,來設定 '

  1. Password Policy
  2. 自動帶入預設密碼
這樣可以節省時間,增加效率。設定方式如下:

設定密碼的default value

選擇要套用的OU


2019年1月4日 星期五

TPAM - 新增群組成員時發現都是反白的無法點選變更

以下兩個情境,各有不同的Group and UserID 管理方式。

1. 群組與UserID是從LDAP帶過來的,這種方式無法透過TPAM修改群組成員(反白)。須在AD新增成員到OU,TPAM會透過Auto Discovery 做sync。


2. 如果是在TPAM手動建立的Group,則可以增加Local Useror LDAP User到此Group。


2019年1月2日 星期三

Upgrade Oracle DBA OCP 10g to 12c R2 ..... Certification Paths

1Z0-060   Oracle 10g OCP --> Oracle 12c OCP 

https://education.oracle.com/upgrade-to-oracle-database-12c/pexam_1Z0-060

Recommended Training

  • Oracle Database 12c R1: New Features for Administrators Ed 2

Additional Preparation and Information

Practice Exams: Oracle Authorized practice exam from Kaplan IT Training: 1Z0-060 Upgrade to 12c - New Features of Oracle Database 12c
https://www.kaplanittraining.com/certification/oracle/1z0-060


1Z0-074   Oracle 12c OCP --> Oracle 12c R2 OCP

Recommended Training

  • Oracle Database 12c R2: New Features for 12c R1 Administrators Ed 1
    • Training On Demand Train online via an Internet connection, 24/7. NT$55,575.00 90 Days (Oracle University)
    • Live Virtual Class Attend live classes in real-time from anywhere with an internet connection. 5 Events5 Days (Oracle University)
  • Oracle Database 12c R1: New Features for Administrators Ed 2

Additional Preparation and Information

Practice Exams: Oracle Authorized practice exam from Kaplan IT Training: 1Z0-074    Upgrade Oracle DBA 11g or 12c to 12c R2 (OCP)


Oracle Database 12c R2: New Features for Administrators Part 1 Ed 1
https://education.oracle.com/oracle-database-12c-r2-new-features-for-administrators-part-1-ed-1/courP_7999

  • Oracle 12cR2資料庫之新功能介紹-DBA篇Part 1  台北 19503 班 2019/04/08 ~ 2019/04/12 每週一二三四五 09:00~16:30  (恆逸)

Oracle Database 12c R2: New Features for Administrators Part 2


2018年12月27日 星期四

升級 Foglight for Virtualization Enterprise Edition to 8.8.5

Understanding product versions

The Management Server and the Agent Manager have been updated to version 5.9.4 for this release.

Supported upgrade path

  • Foglight for Virtualization, Enterprise Edition 8.8.5 may be directly upgraded from version 8.8. 
  • To upgrade from version 8.7.5, 8.7, 8.6, you must first upgrade the virtual appliance to version 8.8, then to version 8.8.5. 
  • To upgrade from version 8.5.5, 8.5, 8.4, 8.3, or 8.2, you must first upgrade the virtual appliance to version 8.6, then to version 8.8, then to version 8.8.5.

Foglight for Virtualization, Enterprise Edition versions

Foglight for Virtualization, Enterprise Edition consists of these key software components:
• Management Server
• Agent Manager
• Cartridges

Component versions

  • Management Server, version 5.9.4
  • NOTE: Foglight for Infrastructure 5.9.4 is embedded with the Management Server.
  • Agent Manager, version 5.9.4
  • Foglight for Action Packs, version 5.6.3.8
  • Foglight Automation, version 5.6.3.8
  • Foglight Capacity Director, version 5.7.7
  • Foglight Capacity Management, version 5.7.7
  • Foglight Capacity Manager, version 5.7.7
  • Foglight Change Analyzer, version 5.7.7
  • Foglight Chargeback, version 5.7.7
  • Foglight for Hyper-V, version 5.7.7
  • Foglight Resource Optimizer, version 5.7.7
  • Foglight for Storage Management cartridge, version 4.6.5
  • Foglight for VMware, version 5.7.7
  • Foglight Net Monitor, version 5.9.4


Preparing to upgrade Foglight for Virtualization, Enterprise Edition

  1. Create a support bundle from your Management Server.
  2. Back up the file system in which Foglight for Virtualization, Enterprise Edition is installed.
  3. Back up your database
  4. Deactivate all agents through the Agent Status dashboard (Dashboards > Administration > Agents >
  5. Agent Status).
  6. If you are currently running the VMware Performance Agent on a 64-bit Management Server, you can use the embedded Agent Manager for the VMware Agent to monitor up to 500 total VMs.

Note for installations monitoring large VMware environments

Some installations monitoring large VMware® environments have customized the VMware agent memory settings. These settings must be reapplied because the upgrade procedure overwrites them with the default settings. 
For each Agent Host with existing VMware Performance agents:
  1. On the agent machine, open the baseline.jvmargs.config file for editing. The file is located in the<Agent_Manager_home>/state/default/config directory.
  2. Make note of the vmparameter.x values. If the values on your agent are different, they must be reapplied after the upgrade.
  3. After upgrading and reapplying the values in the baseline.jvmargs.config file, remove the deployed negotiation configuration settings directory  (<Agent_Manager_home>/state/default/config/deployments), and restart the Agent Manager. The new settings take effect after the Agent Manager is restarted.

Upgrading Foglight for Virtualization, Enterprise Edition from a previous version

The Foglight for Virtualization, Enterprise Edition components (Management Server, Embedded Agent Manager, Cartridges) are all upgraded automatically by the Foglight for Virtualization, Enterprise Edition installer.

  1. Download the Foglight for Virtualization, Enterprise Edition installation package for your platform from the Support Portal.
  2. Manually shut down your Foglight Management Server. Do not depend on the installer to shut down your running Management Server and/or embedded database, due to the timing problem. Ensure that the Management Server has stopped running before launching the Foglight for Virtualization, Enterprise Edition installer. To verify that all Management Server processes have stopped, type the following command: tasklist /v | find "fms"
  3. For extra reliability, you must back up the Foglight database.
  4. Upgrade the existing Foglight for Virtualization, Enterprise Edition installation using the appropriate installer.
  5. The installer detects the earlier version of Foglight for Virtualization, Enterprise Edition. Follow the on-screen upgrade instructions. Select Upgrade and click Next.
  6. After the Foglight for Virtualization, Enterprise Edition application is upgraded, the licensed cartridges are upgraded automatically.


Upgrading the Agent Manager

The embedded Agent Manager is updated as part of the upgrade process. Any additional, external Agent Managers may need to be updated. If the Version of any agent host listed is not 5.9.4, continue following this procedure to upgrade the Agent Manager.
  • To upgrade, select the agent host from the list and click Upgrade. The process may take a few minutes andthe agent host may disappear from the list temporarily while it is restarting.

Upgrading Foglight for Virtualization, Enterprise Edition agents

After upgrading Foglight for Virtualization, Enterprise Edition, the database, and cartridges, the agents used by some of the cartridges must be updated to ensure proper data collection. Specifically, this section describes the procedures for upgrading monitoring agents.

Upgrading the VMware Performance agent

  • Log in to Foglight for Virtualization, Enterprise Edition using an account with administration-level permissions.
  • Deactivate all VMware Performance agents.
    • On the navigation panel, under Dashboards, click Administration > Agents > Agent Status.
    • On the Agent Status dashboard, select the existing VMware Performance agents and click Deactivate.
  • Upgrade the agent package. On the VMware Environment dashboard > Administration tab, select all agent instances from the Agents table, and click Update Agent on the menu bar.
  • Activate all VMware Performance agents. On the VMware Environment dashboard > Administration tab, select the deactivated VMware Performance agents, and click Activate on the menu bar.


Upgrade Foglight for Infrastructure

As part of the transition to Quest Software, Foglight for Infrastructure 5.8.5.8 and higher deprecate the following agent types:
  • DellUnixAgent: Replaced with the new UnixAgentPlus agent type.
  • DellFileLogMonitorAgent: Replaced with the new FileLogMonitorAgent agent type.
  • DellWindowsEventLogMonitorAgent: Replaced with the new WindowsEventLogMonitorAgent agent type.
Install version 5.9.4 of the cartridge as you would a new Foglight for Infrastructure cartridge. Do not delete the older version of the .car file. Install version 5.9.4 over the older version.


One Identity Safeguard - 使用密碼庫管理系統以動態獲取連線帳密


Application to Application (A2A) integration


用於向系統管理員以及Application to Application和Application to Database方案發布特權憑據。
在應用程序到應用程序和應用程序到數據庫方案中,特權帳號密碼的發出,可以結合自動化工作流程來達成。

One Identity Safeguard for Privileged Passwords 應用程式密碼管理功能,可將hardcoded的應用程式密碼和資料庫密碼,替換為使用程式呼叫,以動態接收帳戶密碼。
可避免在程式中 Hard-Coded Credentials

使用A2A整合 動態的取得帳密

使用 "Application to Application" 服務,允許協力廠商應用程式從 Safeguard for Privileged Passwords vault中取得連線密碼, 而無需通過一般的工作流程。例如, 假設您有一個自動系統,每24小時對資料中心的各種服務執行一次例行系統診斷。為了使自動化系統執行診斷,它必須首先對目標伺服器進行身份驗證。由於目標伺服器的所有帳密都存儲在 Safeguard for Privileged Passwords vault中,因此自動系統通過將使用程式呼叫,以動態接收帳戶密碼。。

1. Retrieve the API key for the selected account from the Safeguard for Privileged Passwords API:


2. To retrieve a credential, use the following request:


可自動更新windows服務與排程工作的密碼

另外一個密碼管理的功能,可以解決常見的問題: 修改密碼後導致windows服務無法啟動的狀況。

為了資安需求,主機的密碼會定期的更新,但常發現特定的服務會在密碼變更後無法啟用。
原因是安裝設定時,Service的帳號/密碼是指定特定user,而非直接使用 Local Service等預設帳號。


One Identity Safeguard for Privileged Passwords 提供的功能,可以避免這個問題。
1. 密變更時更新服務
2. 密碼變更時更新工作


更多的資訊,請參考原廠網頁: https://www.oneidentity.com/products/one-identity-safeguard-for-privileged-passwords/


2018年12月20日 星期四

How to, 利用OneDrive分享,取代email傳送檔案


雲端時代,公司使用微軟Office 365,順便提供1TB的OneDrive雲端儲存空間。

以往傳送檔案給客戶,有用

  1. email
  2. FTP
現在只要把檔案放到PC的OneDrive folder,就可以很簡單的分享給客戶。

以下看圖說故事。


How to, Google 文件 查詢版本紀錄


How to, 使用JSON 資料來源製作報表


開放資料已經普遍,JSON成為主要的資料交換格式之一。
但他不給人看的。

以下學習是: 如何從JSON資料來源,轉換成容易閱讀的報表。


第一步可以用網頁工具,將JSON轉成CSV格式,大致看一下這個資料的欄位和內容。

Convert JSON to CSV
https://konklone.io/json/

接下來就可以用微軟Excel,來製作報表了。
Excel 2013、2010版本的事前準備: Excel2013、2010必須到微軟官網下載安裝此功能,安裝後再到「檔案」 / 「選項」 / 「COM增益集」啟用功能,才可以使用。

檔案 -> 資料 -> 取得資料 -> 從檔案 -> 從JSON


選擇JSON file


這時會進入Power Query 編輯器
點選 到表格

點選確定

挑選需要呈現的欄位。

排列欄位順序。

成了,點選關閉並載入。

一份報表就完成了。

如果JSON 檔案有被更新,只要點選檔案 -> 資料 -> 全部重新整理。
即可更新報表內容。